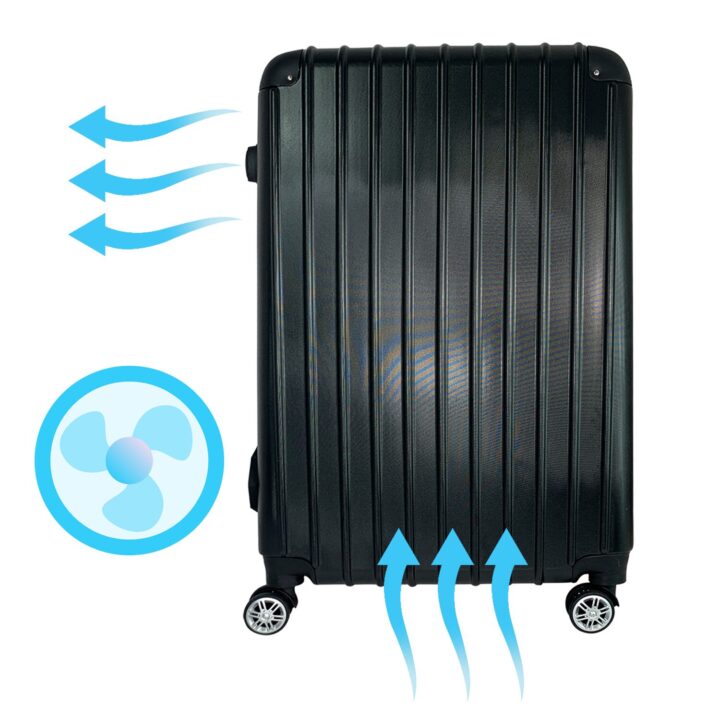
GROWING HAS NEVER BEEN EASIER
WITH INTEGRATED VENTILATION
WITH LED PLANT LAMP
These instructions apply to all types of plants and grow systems - whether in a suitcase, tent or 2-tier tent.
If you do not yet have a grow box, you can compare these here.
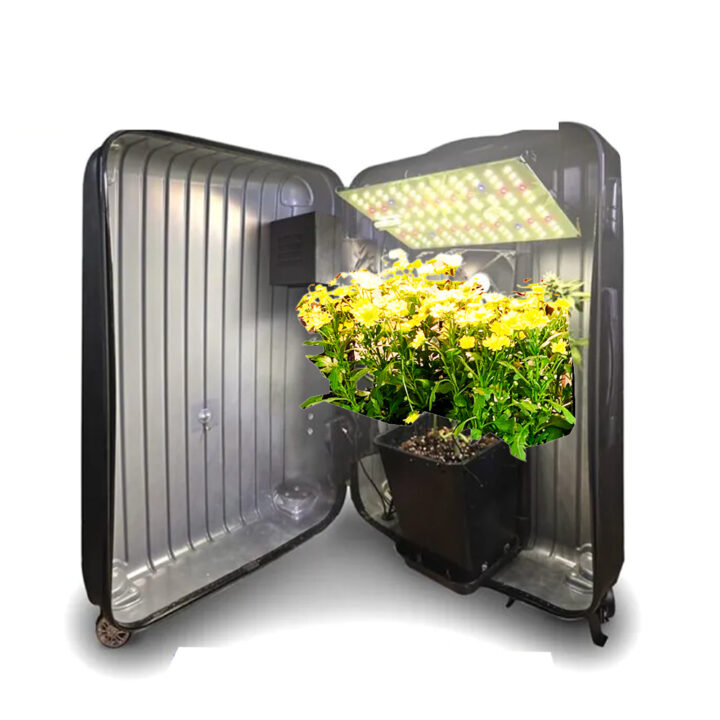
All-in-one complete solution -
Compact, inconspicuous and quiet
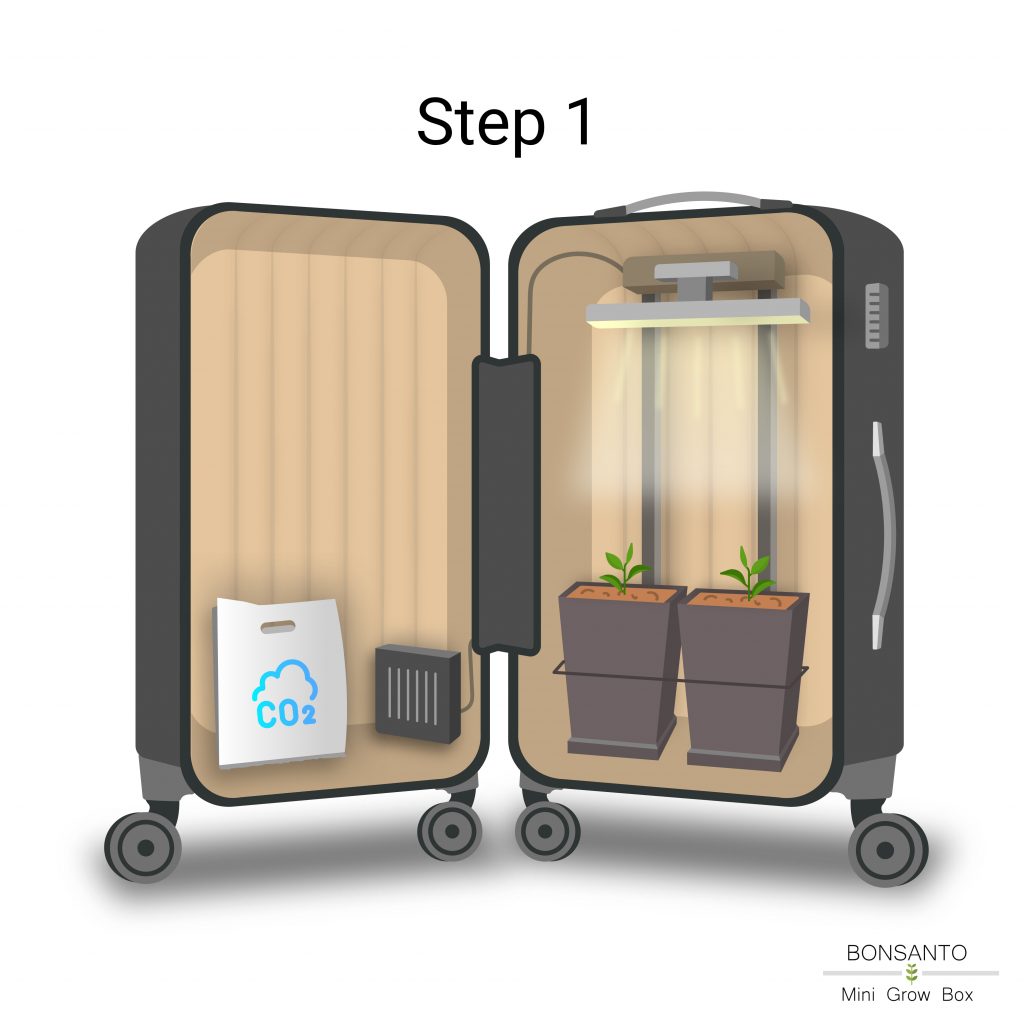
Step 1:
Fill the pots with pre-fertilised, organic Bonsanto soil and water them with 500 to 700 ml of water per 3.2 litre pot. The soil should be very wet when watering for the first time so that the organisms can be activated. Plant the seed a maximum of 8 mm deep in the soil. Cover the seed lightly with the moist soil. Stretch cling film over the pot and poke a few holes in it, for example with a toothpick. The Bonsanto soil is a germ-friendly soil, which was specially developed for this purpose.
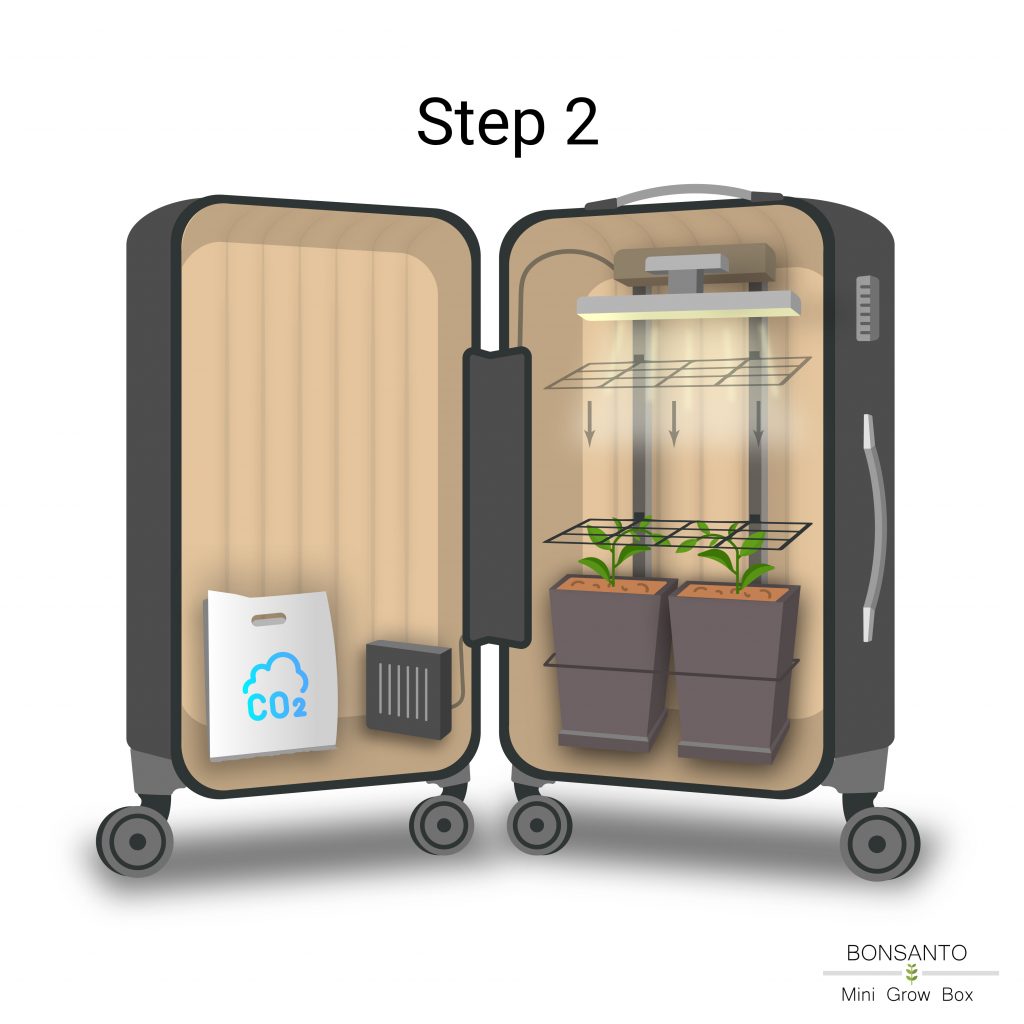
Step 2:
Once you have planted the seed in the soil, run the Bonsanto Grow lights directly 24 hours a day. This creates the right temperature in the soil for the seed to start germinating. When the first seedlings appear, remove the cling film. You can now run the activated charcoal filter around the clock. We recommend leaving the case slightly open for the first three weeks, as it is often a little too warm for such young plants at the beginning.
From the 7th day after germination, the indoor fan should be operated in a rhythm of 1 hour on and 1 hour off. After day 14 (after germination), reduce the lighting duration to 18 hours per day (for automatic plants) or 12 hours per day for feminised seeds.
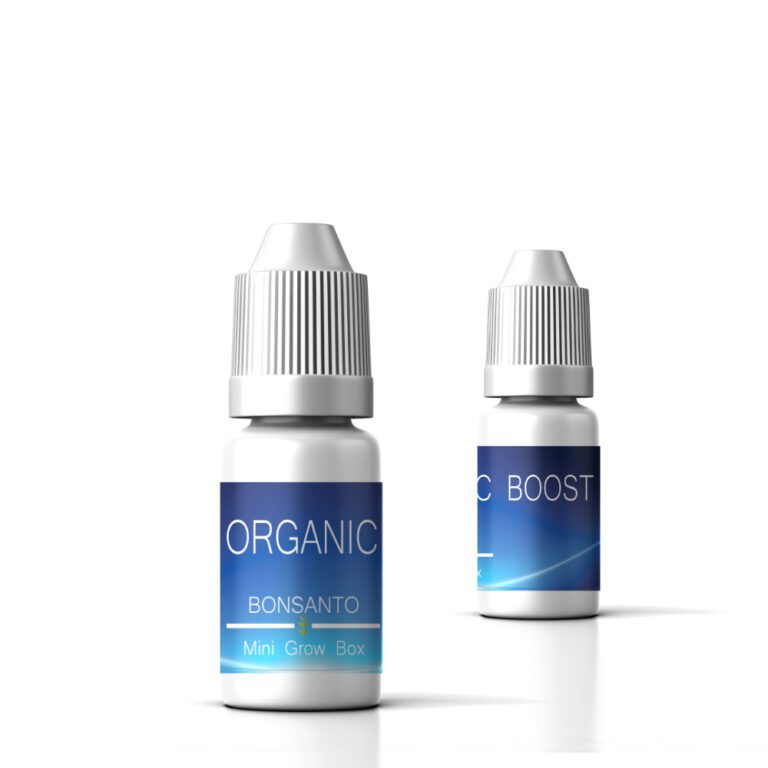
Watering 10-14 days after germination: It is important that the top 10 cm of soil is dust-dry before you water for the first time. You can use Organic Boost at 30 drops per litre when watering. Make sure that nothing runs down the side of the pot when watering, but that it all seeps into the soil.
Water 20 days after germination: Use approx. 400 ml. After that, you should water again and again as soon as the top 2 cm of soil is dust-dry. Over time, the plant will need more and more water. From week 6 onwards, you can water every 2 to 3 days.
Allow a dry phase of 5 to 8 days in week 5 and week 9 to strengthen the root system. The watering rules are only rough recommendations - always observe the plant's reaction. As a general rule, over-watering is worse than under-watering.

Send the plant into flowering from week 3 at the latest (day 21 after germination) with an exposure time of 12 hours. (Note: automatic plants can still be illuminated for 18 hours).

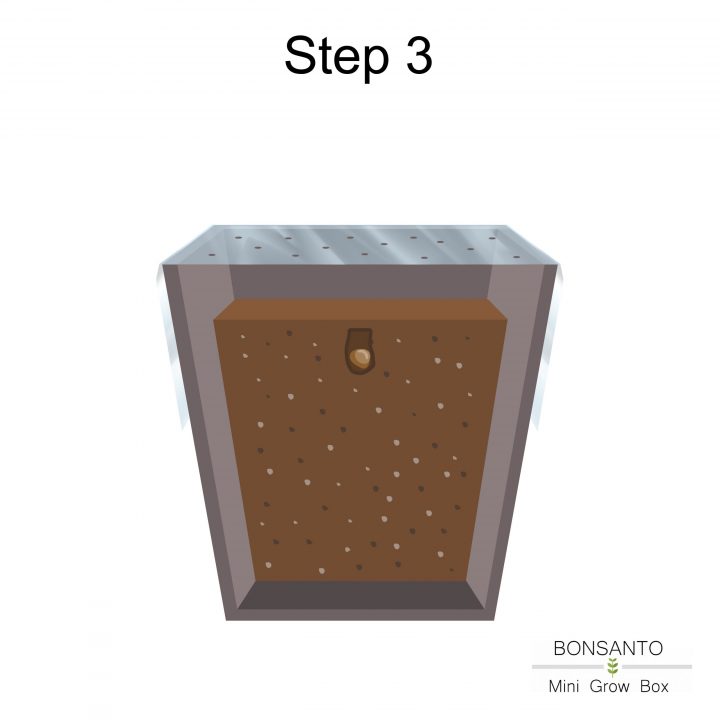
Step 3:
You have already used Organic Boost the first time you watered the plant. For subsequent waterings, use the following dosage: 30 drops (1 ml) of Organic Boost per 1 litre of water. As an alternative to the drops, you can also use our Dosing unit use. Extreme Energy should be used from the 5th week onwards, with a recommended dosage of 6 drops per 1 litre. Both fertilisers can be used together, but you should first add water and then the fertilisers to a container.

From the 10th week of the flowering phase, you can leave the indoor fan running permanently.
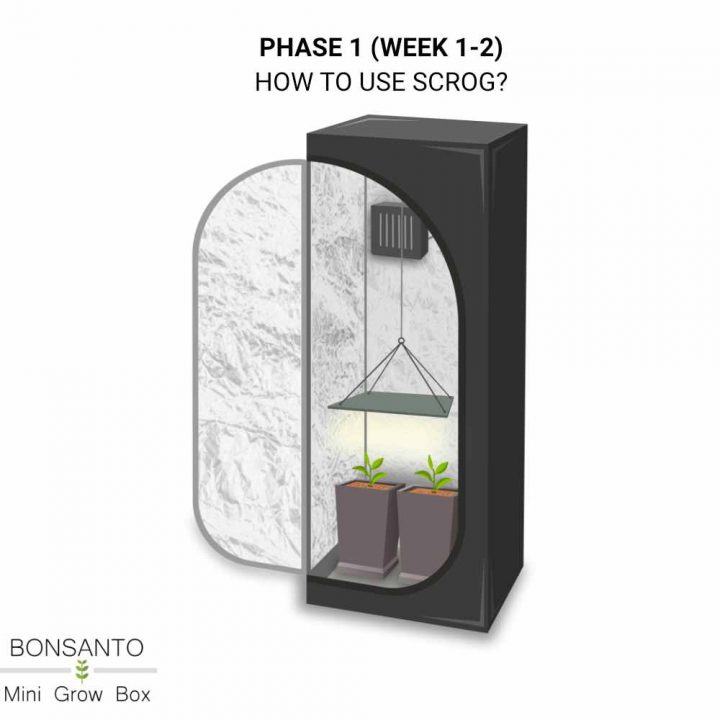
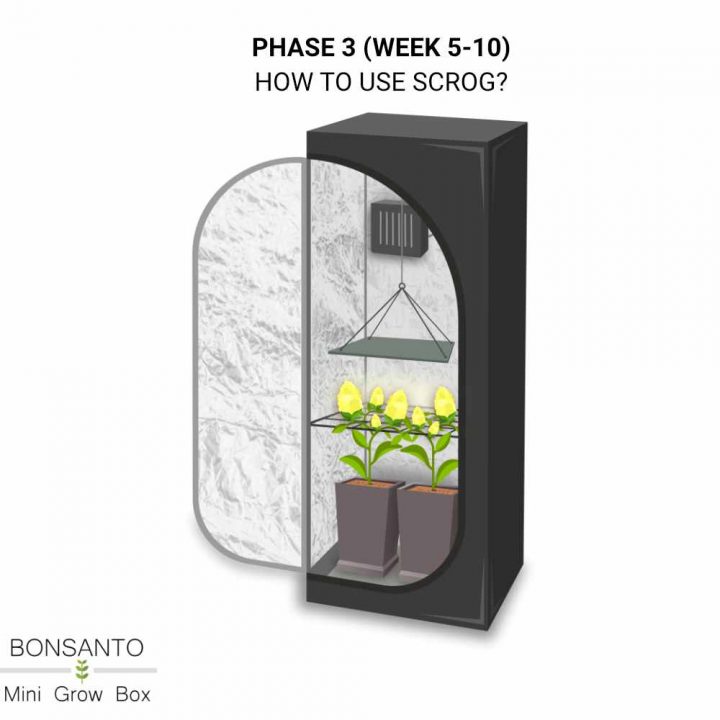
To grow a 1.8 metre tall plant in a case, proceed as follows:
Bend the plants under the SCROG grid to limit their height. Start this in the 4th week. Almost all branches of the plant should be limited in height by the SCROG grid. The SCROG grid should be positioned as close as possible to the pot (about a hand's width). Don't worry, your plant will also tolerate intensive tying down (possibly bending). The Bonsanto soil and Organic Boost fertiliser support this process. The SCROG grid limits the height of the plant during the growth phase, which also allows you to carry out low-stress training (LST). Alternatively, you can also tie the individual strands down with cable. You can find a nice video on this at here.

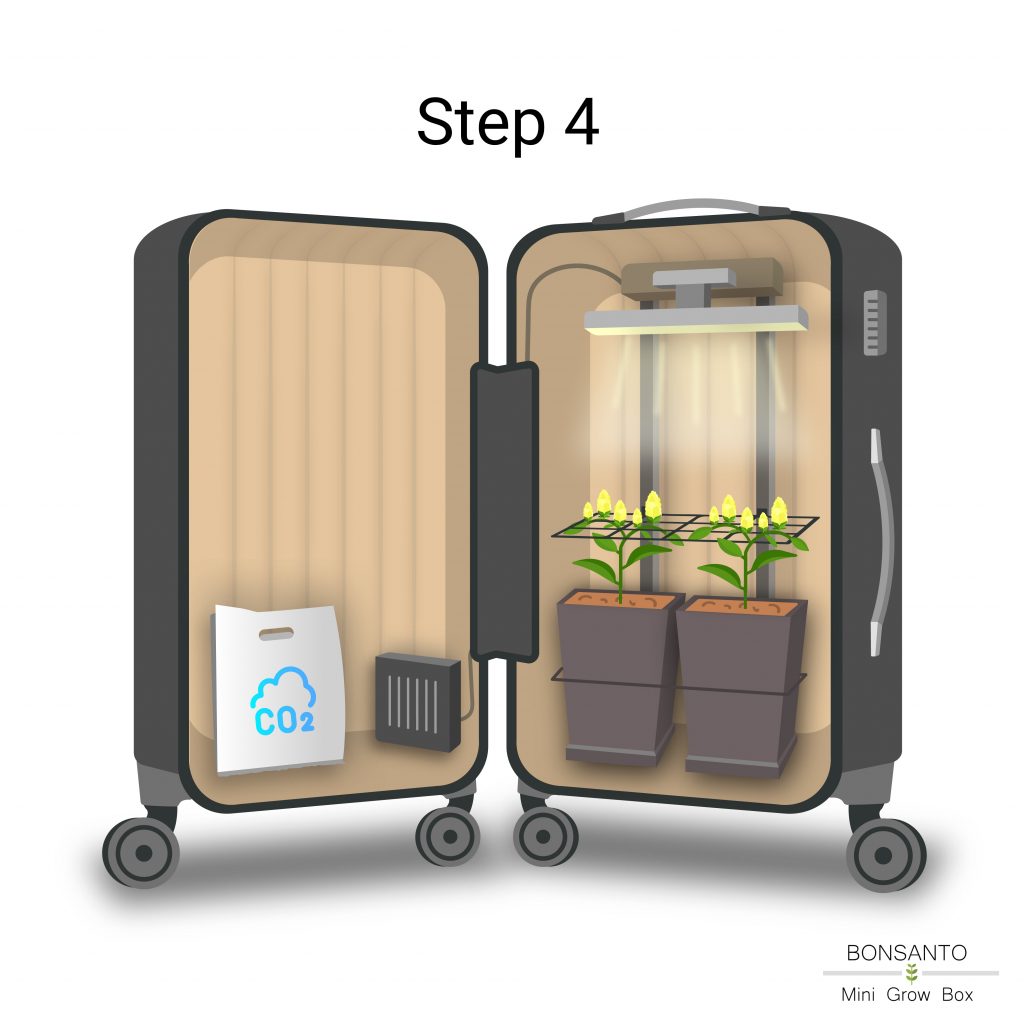


Step 4:
From the 3rd to 4th week, place the Bonsanto CO2 Bags in the box to accelerate the growth of your plants with an additional supply of CO2. Before you hang up the CO2 bag, fill it one third full with water. It is important that the water is warm (but not hot!) when you fill it so that the substances it contains can react with each other. You should also knead the bag for about 30 seconds so that the contents mix well with the water. Then simply hang the CO2 bag on the hook provided in the case. From this point on, the CO2 bag can be used throughout the entire cultivation phase and should be replaced every 4 weeks. Over time, add new soil to the pots, as this has important pH-neutralising properties.

Step 5:
After 8-12 weeks your plant should have beautiful buds. Important tip: Do not run the interior fan during drying. The drying process must take place slowly. Cut the plant at the bottom of the main stem and let the plant dry with all leaves for 2 weeks without the indoor fan, but with the activated carbon filter running. You can also use the Bonsanto drying case . This will save you valuable time and you can start your next grow right away. When the plant has dried on the stem for 2 weeks, remove all leaves from your plant and expose the buds. Dry your crop with Boveda Packs in the appropriate jars. In the Bonsanto Grow Box. Again, the activated carbon filter will help you avoid any odors.
Optional Bonsanto Grow Bible:
If you would like more expert tips from more than 5 years of research, we recommend the Grow Bible One Pager from Bonsanto. You will receive a 50% discount on the Grow Bible One Pager as a Bonsanto Grow Box owner.
-

Irrigation Grow Bible One Pager - Expert knowledge
24,50 €incl. 19% VAT
plus delivery costs
Add to basket -

Seed Grow Bible One Pager - Expert knowledge
19,00 €incl. 19% VAT
plus delivery costs
Add to basket -

Harvest Grow Bible One Pager - Expert knowledge
17,50 €incl. 19% VAT
plus delivery costs
Add to basket
-
 -48%
-48%Double yield - 60x60x180cm Bonsanto® complete set - 2-tier grow box
299,00 € – 349,00 €incl. VAT
plus delivery costs
Select options This product has multiple variants. The options may be chosen on the product page -
NEO V 3.0 - Mini Grow Box Case M
289,00 €incl. VAT
plus delivery costs
Select options This product has multiple variants. The options may be chosen on the product page -
NEO V 3.0 - Mini indoor garden case XL
429,00 €incl. VAT
plus delivery costs
Select options This product has multiple variants. The options may be chosen on the product page