Manual Grow Tent - 40×40; 60×60; 80×80; 100×100

Contents Technical description
Tent dimensions (cm) 40x40x120; 60x60x160; 80x80x180; 100x100x200
LED plant lamps Bonsanto® / SANlight® Full spectrum LED light
Volume 192 / 576 / 1152 / 2000 litres
Tent frame material Steel tubes Ø16mm, plastic angle bracket
Material walls Screen M210D
Filter system 5V USB fan, MAX activated carbon filtration x 2 / x1
Circulating air 5V USB fan Pro x 2
Colour Black

The tent has two openings, both of which will later be used for the activated charcoal filter. Thread all the tent cables through hole A. Depending on the size of the tent, the dimensions of the openings may vary, but the procedure remains the same.

Installation of activated carbon filter in Bonsanto grow tent

Start by installing the activated charcoal filter in the upper section of the tent. To do this, feed the thread through the hole. Then use the nut and screw it onto the thread from above. Pull the red rope to close the hole. The activated charcoal filter should now hang down.

In this example, you have the option of fitting the activated charcoal filter at the bottom or even installing a second activated charcoal filter. The procedure is the same as in the first picture. It would then simply hang inwards and downwards. If you want a more attractive look, you can also insert the activated charcoal filter into the tent wall (see picture on the right). Again, it is important that you pull the red ropes taut to ensure that the thread is firmly enclosed by the tent.

Installation of the Bonsanto activated carbon filter in the grow tent Interior view
An additional option is to cut a hole in the tent and mount the activated charcoal filter in the tent in this way. The other openings could then either be closed (using the red cord) and only used for cable feed-throughs, for example. Another advantage of this method is that you can extend it as required by adding further activated charcoal filters.

After you have cut out the hole, feed the thread through the hole from the inside. You can then easily screw the nut onto the thread from the outside.

Installation of Bonsanto activated carbon filter in the grow tent

Route the cables through the rear hole. In this example, an activated carbon filter was also used for the hole. The cables are fed through first, followed by the thread. You are free to decide whether you would rather cut a separate hole for the activated charcoal filter (see steps above) or use the cable outlet for this.

An additional option is to cut a hole in the tent and mount the activated charcoal filter in the tent in this way. The other openings could then either be closed (using the red cord) and only used for cable feed-throughs, for example. Another advantage of this method is that you can extend it as required by adding further activated charcoal filters.

The next step is to hang the lamp in the centre of the tent on the upper poles using a carabiner and a cable tie. This is very easy and quick. The cable pull allows you to adjust the height of the lamp.

The next step is to install the fans in the tent. This can be done easily using cable ties or clamps.

As there is a constant negative pressure in the tent due to the activated charcoal filters, the tent also needs an air supply. We recommend opening the side window slightly so that fresh air can flow into the tent. Alternatively, the zip can also be kept slightly open (10-15cm).

The Bonsanto logo is shown.

Notes

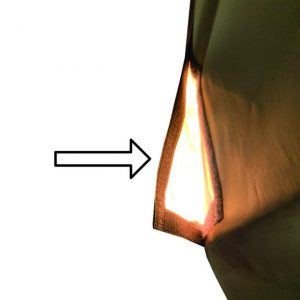
PLEASE DO NOT LOOK INTO THE LAMP - NOT EVEN INDIRECTLY! THE LIGHT CAN DAMAGE YOUR EYES! ALWAYS SWITCH OFF THE LAMP BEFOREHAND. OR USE BONSANTO® SAFETY GOGGLES.

The picture shows the black UV 400 safety goggles from Bonsanto.

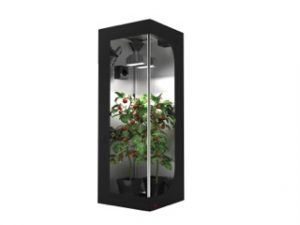
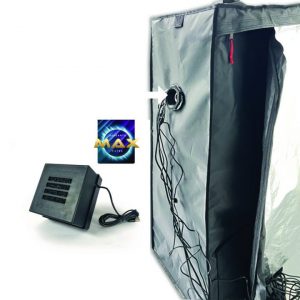
Bonsanto Mini Grow Box

FURTHER IMPORTANT INFORMATION

Let the activated carbon filter run for 24 hours - change the activated carbon every 4-6 months.

Cultivation instructions can be found on the Bonsanto homepage under „Cultivation“.


Please fill the CO2 bag with 0.3 litres of warm water. (Please do not add more water, otherwise the CO2 bags will overflow).